I busted out my Gocco and got ready to start being creative. At this point we didn't have a theme or anything really picked out besides the colors.
The first step in Gocco mass production is burning the screen.
 You simply line up your printed out/copied image on the grey sticky pad. The top of the gocco is made of a see through plastic. You can see what the actual image will look like and if it's lined up correctly or not. Move your image around as much as you want, until you get it where you want it and it looks perfect.
Once you have your image lined up, you open the top of the Gocco (it flips up) and insert the blue filter and then the screen on top of the filter.

place 2 bulbs in the housing(the yellow thingy), line up the arrows on the housing with the arrows on the Gocco (orange part) or your housing will get stuck--don't ask how I know this.
 Close your eyes, turn your head and push down. The gocco will flash and your image will be burned onto the screen. If you have done it properly, the paper with your printed image will be stuck to the back of the screen. Don't remove this just yet.
Next,pull the top layer up, bust out your ink block (the squishy silver stuff) and block your image off. This helps the ink stay in the area you need it to stay in and the image stamps clearer when you use it.

ink up

peel off the paper, put the screen back into the gocco, place your blank cardstock down and stamp you little heart out.
 Sounds a lot more complicated than it is.
I burned two screens to make our save the dates (well, three really, but my image moved and was crooked so it was a wasted screen).
This is the first pass I made for our save the dates
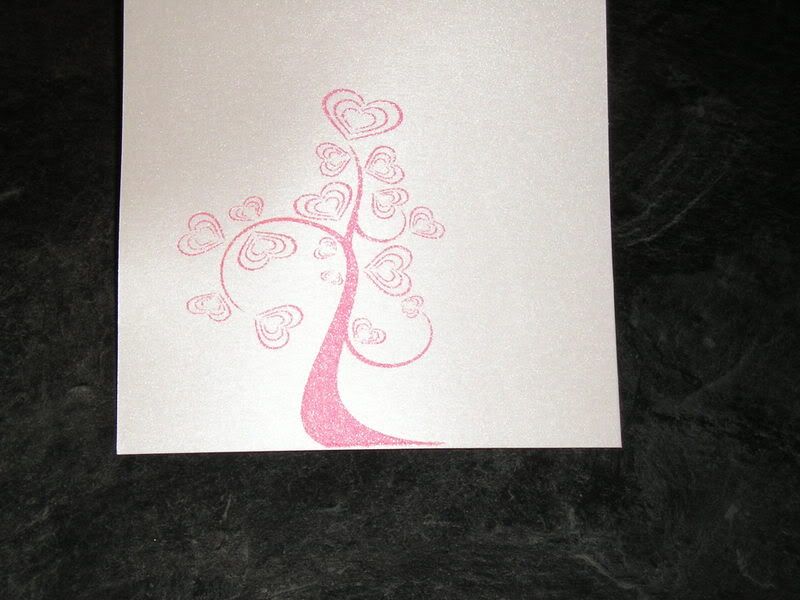
I used a clear embossing powder which I sprinkled on, and the tipped the card to get off the excess, then I used my embossing gun that I bought at AC Moore with a 1/2 off cupon to heat it up. Easy, but time consuming. It raised my image and made it look more professional. I highly recomend embossing if you want a little texture.
My second pass is what I wish I had spent more time on. The words should have been larger, and I wish I had used a cooler font. I was limited at the time with the font thing because we didn't have a working printer, so I printed it off at work, and I didn't want to download a font on my work computer, so I was chained to the ones that came in word 2003.
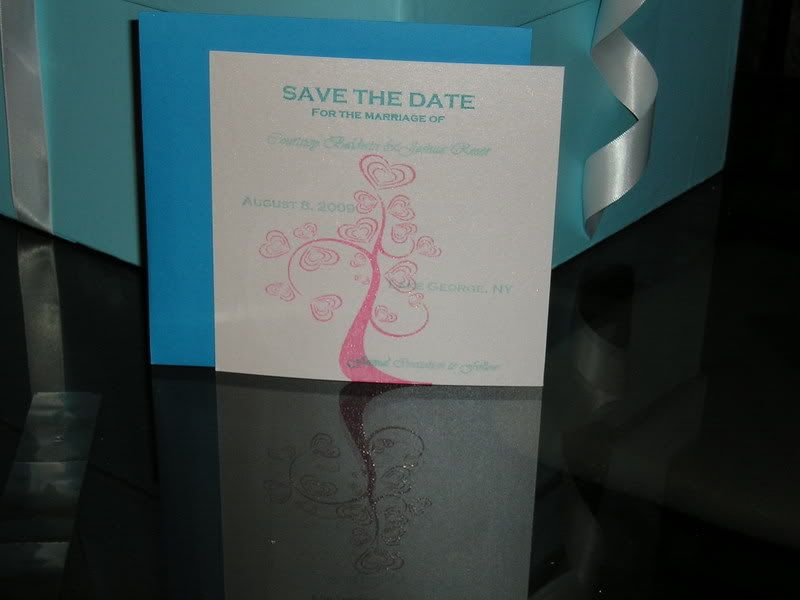 in retrospect I wish I had done the writing on the bottom in black so it showed up better. I am a little disapointed with my results, but felt like I was on such a time contraint that I really didn't care at that point. I made these before I really realized the potential of what they could have been, but in reality not tooooooo shabby for my first mass production.
The next project will be better, I swear.
I have big plans for the invites.
Did you send out Save the dates? How creative did you get?
I always wanted to try Gocco but never bought one. They look fabulous!
ReplyDeleteaww, thanks. The Gocco is really fun, I only wish I had discovered it before it became "extinct" for lack of a better word. Nonetheless, I plan on getting great use out of it!
ReplyDeleteCourtney those are awesome! I love love love your tree of hearts :)
ReplyDeleteWe were going to Gocco ours, but sent them out the be printed b/c of a time crunch.